🔥 [New] Customize and Print SKU Labels from BigSeller
Update Time: 21 Nov 2025 10:36
Many BigSeller features — such as On Shelf, Stock Count, Creating POS Retail Orders, and Move — also support label scanning to automatically fill in SKU information, helping you save time and avoid manual entry.
Step 1: Add Merchant SKU
The SKU label is generated by merchant SKU information, like merchant code and GTIN. So please add the merchant SKU first.Steps to Add a Merchant SKU
Step 2: Set Label Template
1) Go to Setting > Print Settings > Label Templates, click +Add Template, and then you can set your label layout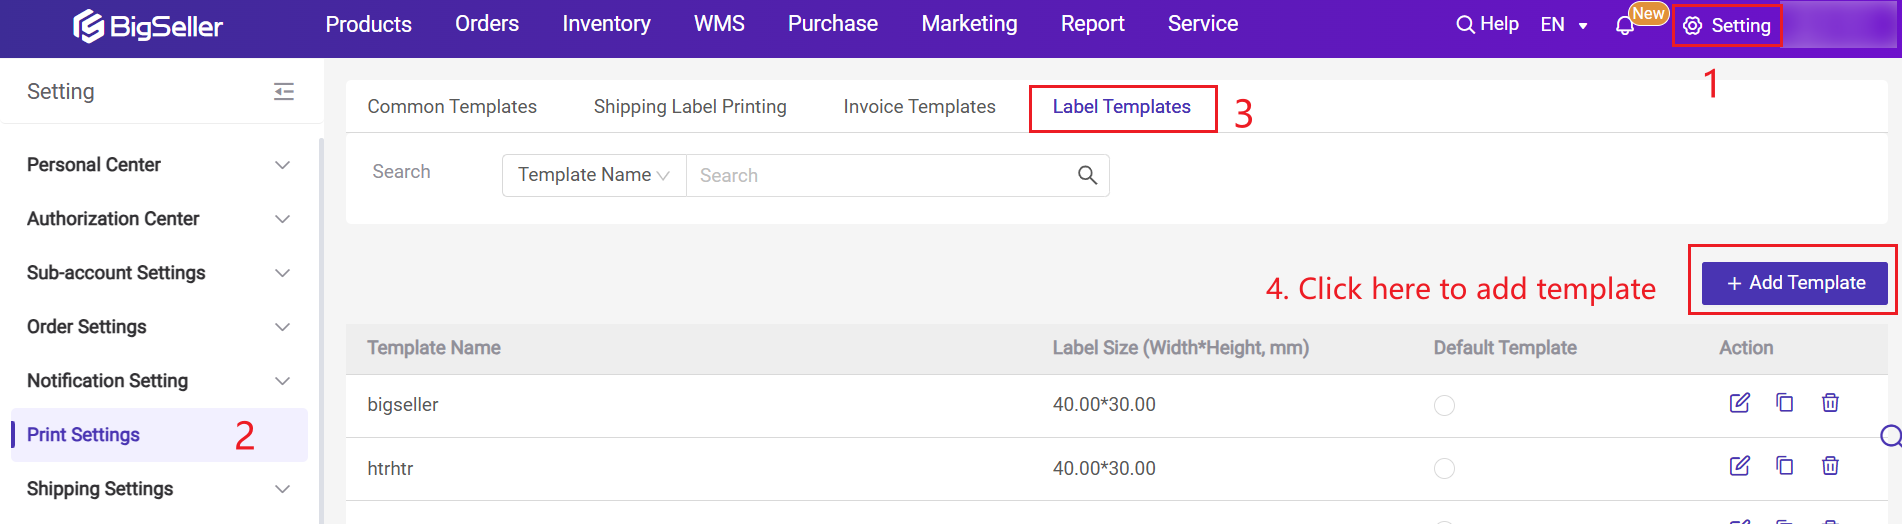
2) After clicking +Add Template, you’ll need to set up the basic information for your label template.
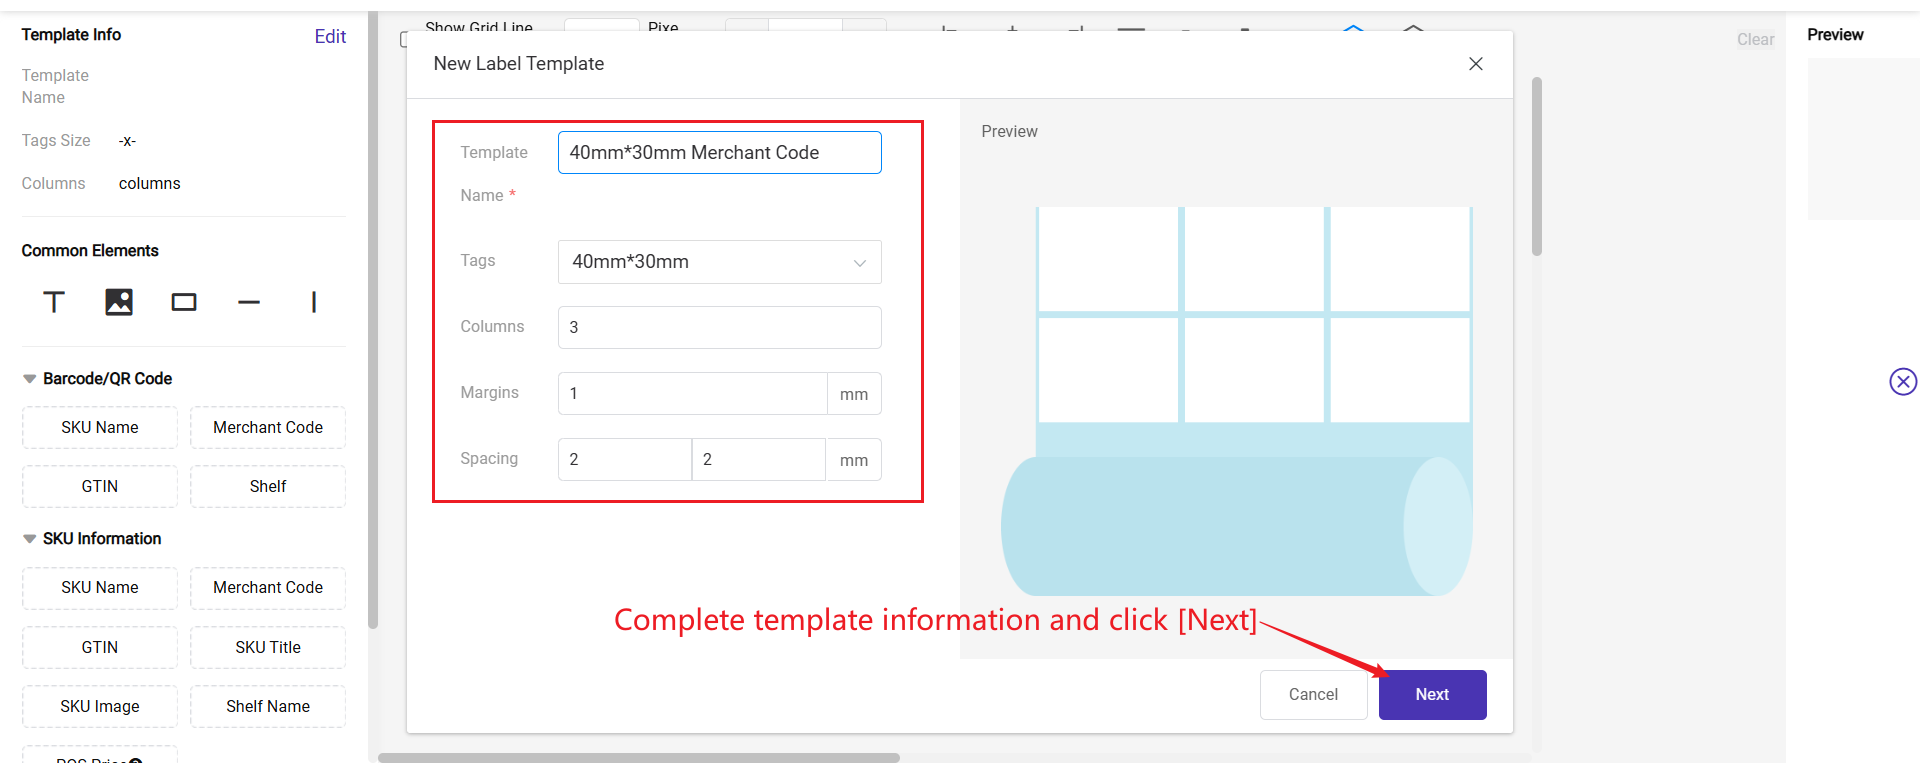
Template Info Fields:
-
Name*: Enter a name for your template so you can easily recognize it later (e.g. 40x30 Label).
- Tags (Label Size)Select the label size you use, such as 40mm × 30mm.
-
Columns: Set how many labels will be printed per row on a single sheet or roll.
-
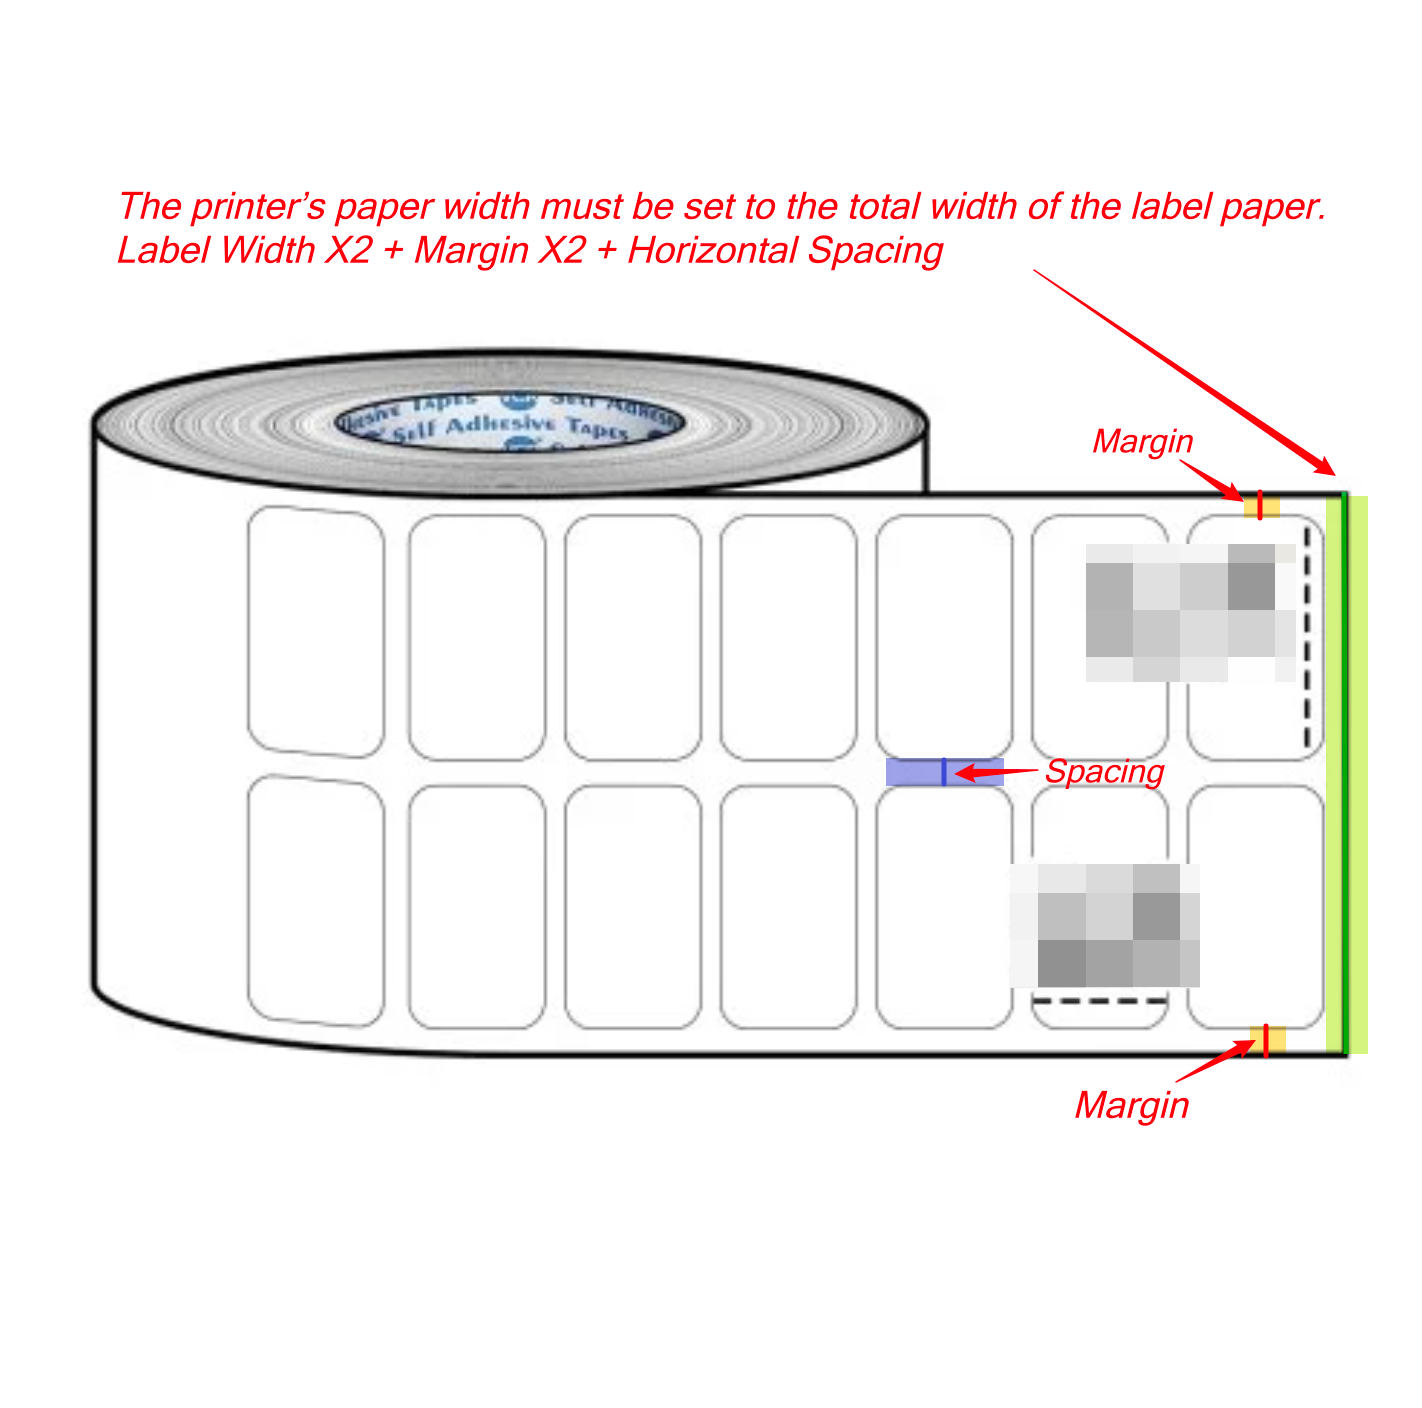
Margins (mm): Set the blank space around the edges of your labels.
-
Spacing (mm): Set the horizontal and vertical spacing between labels.
A real-time Preview will be shown on the right side of the screen so you can visually check the layout before saving. Once all fields are set, click Confirm to create your template.
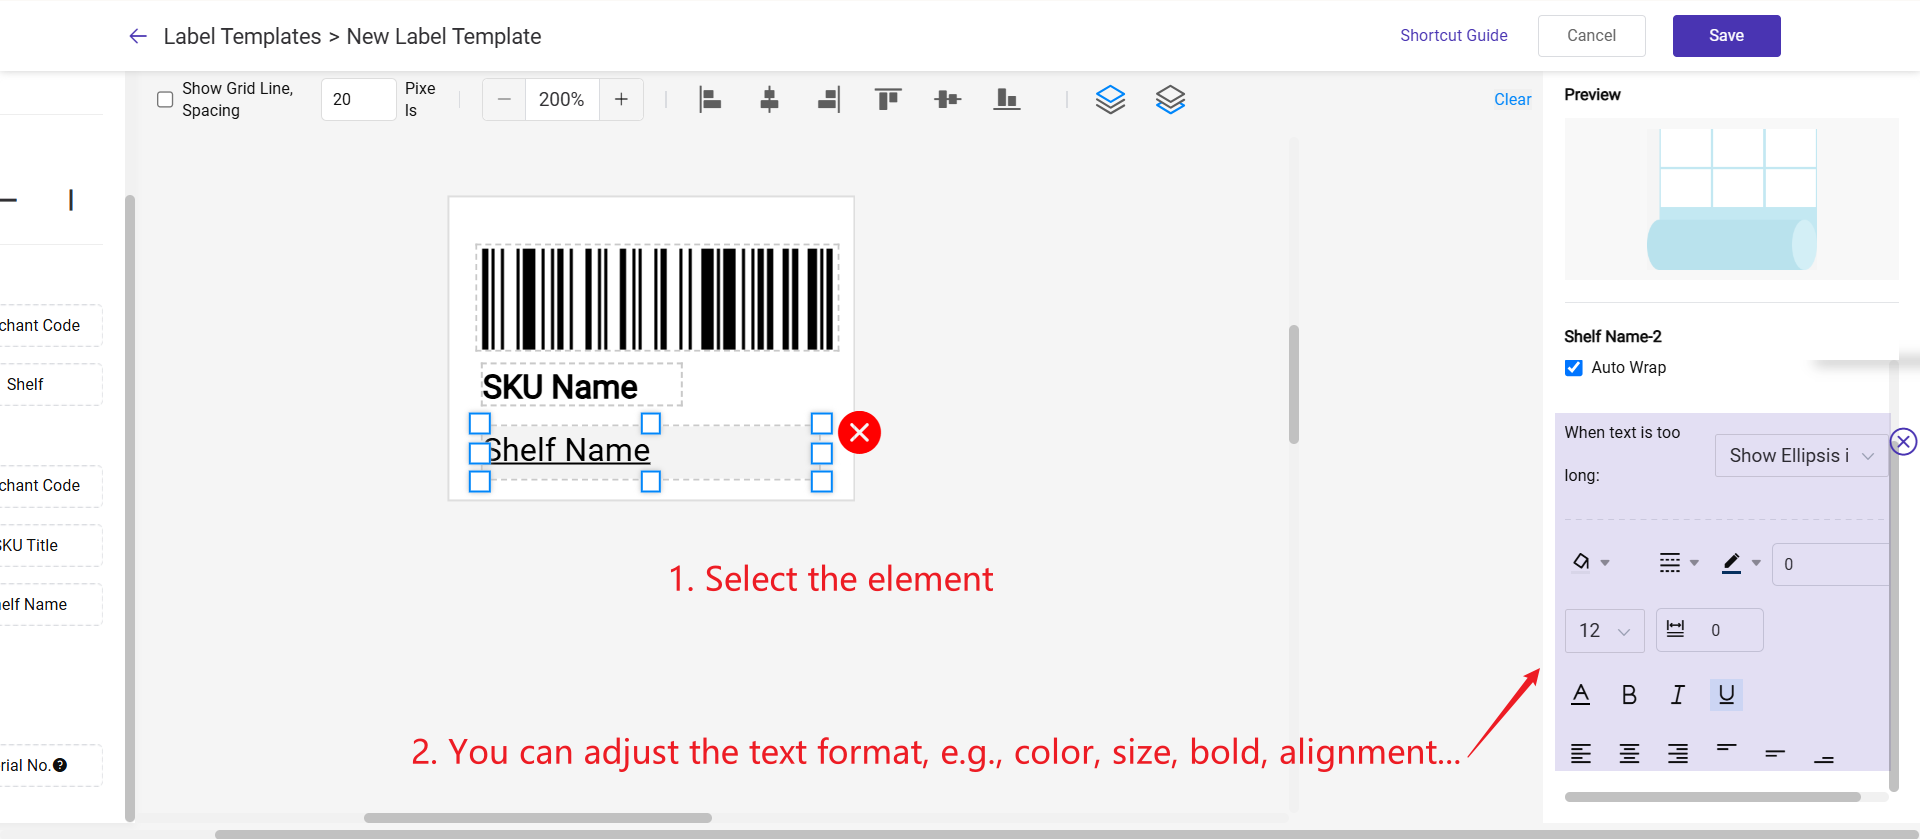
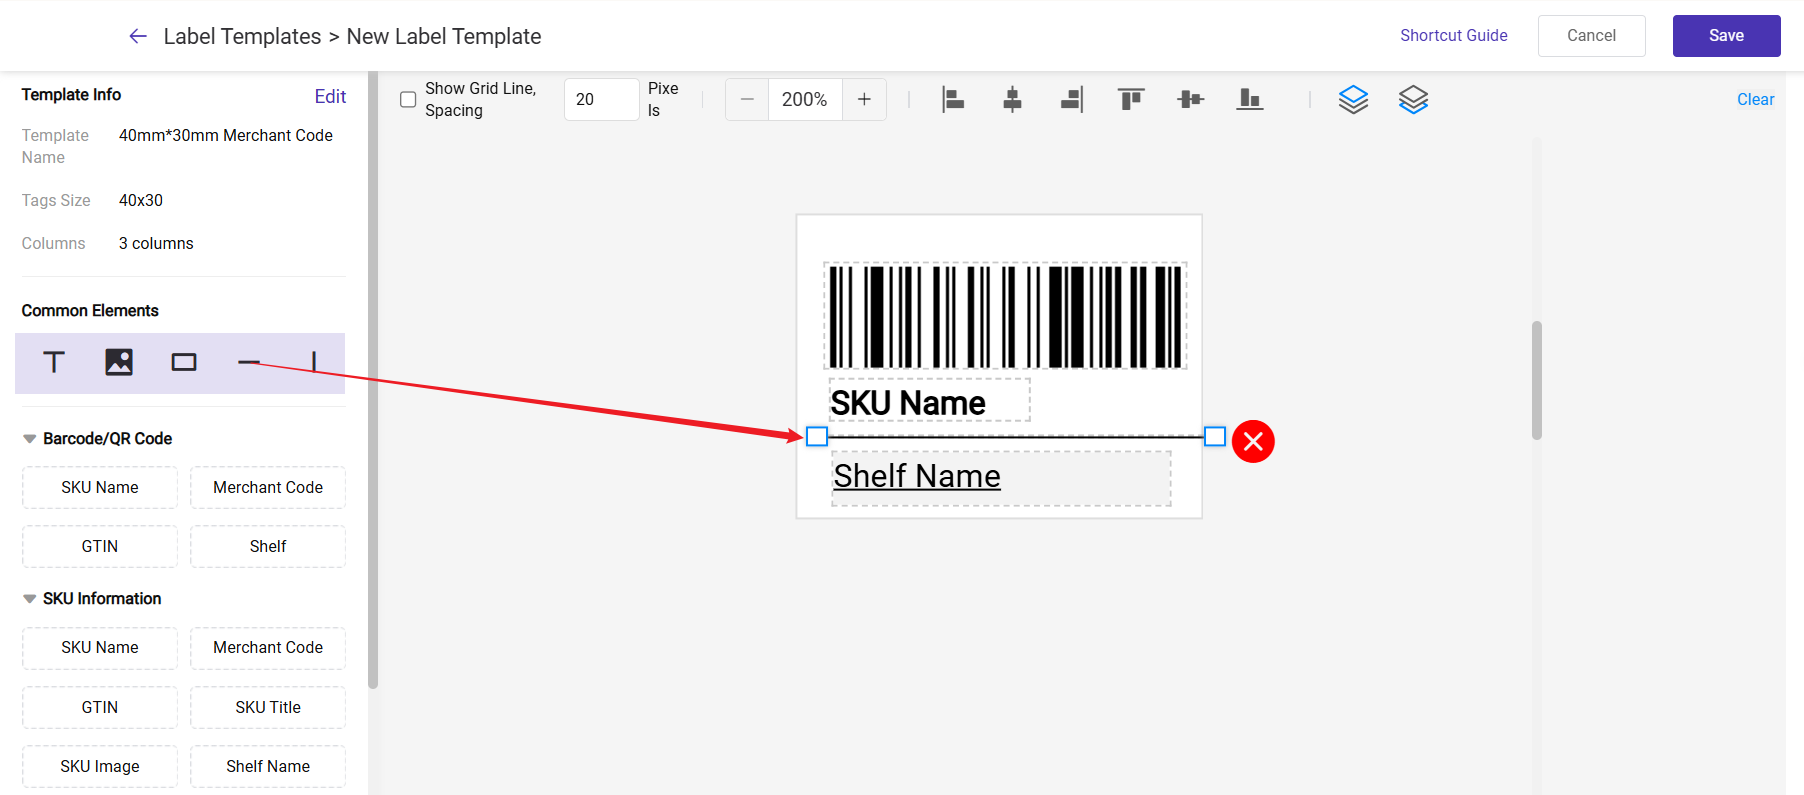
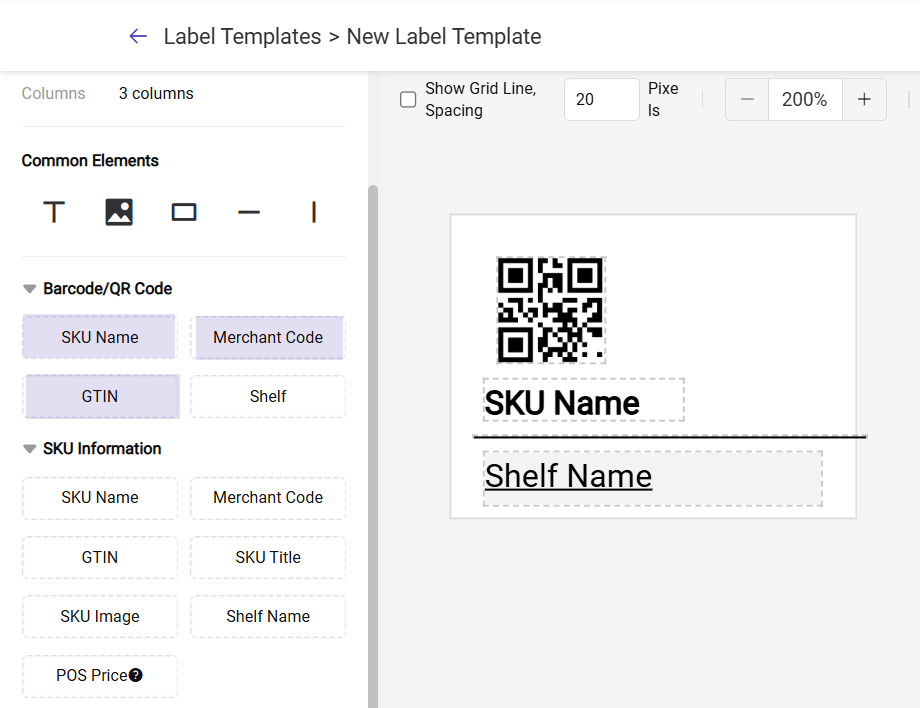
3) With the new drag-and-drop template editor, you can design labels the way you want:
- Add or remove fields (e.g., SKU barcode / QR code / SKU name, Merchant code, shelf....)
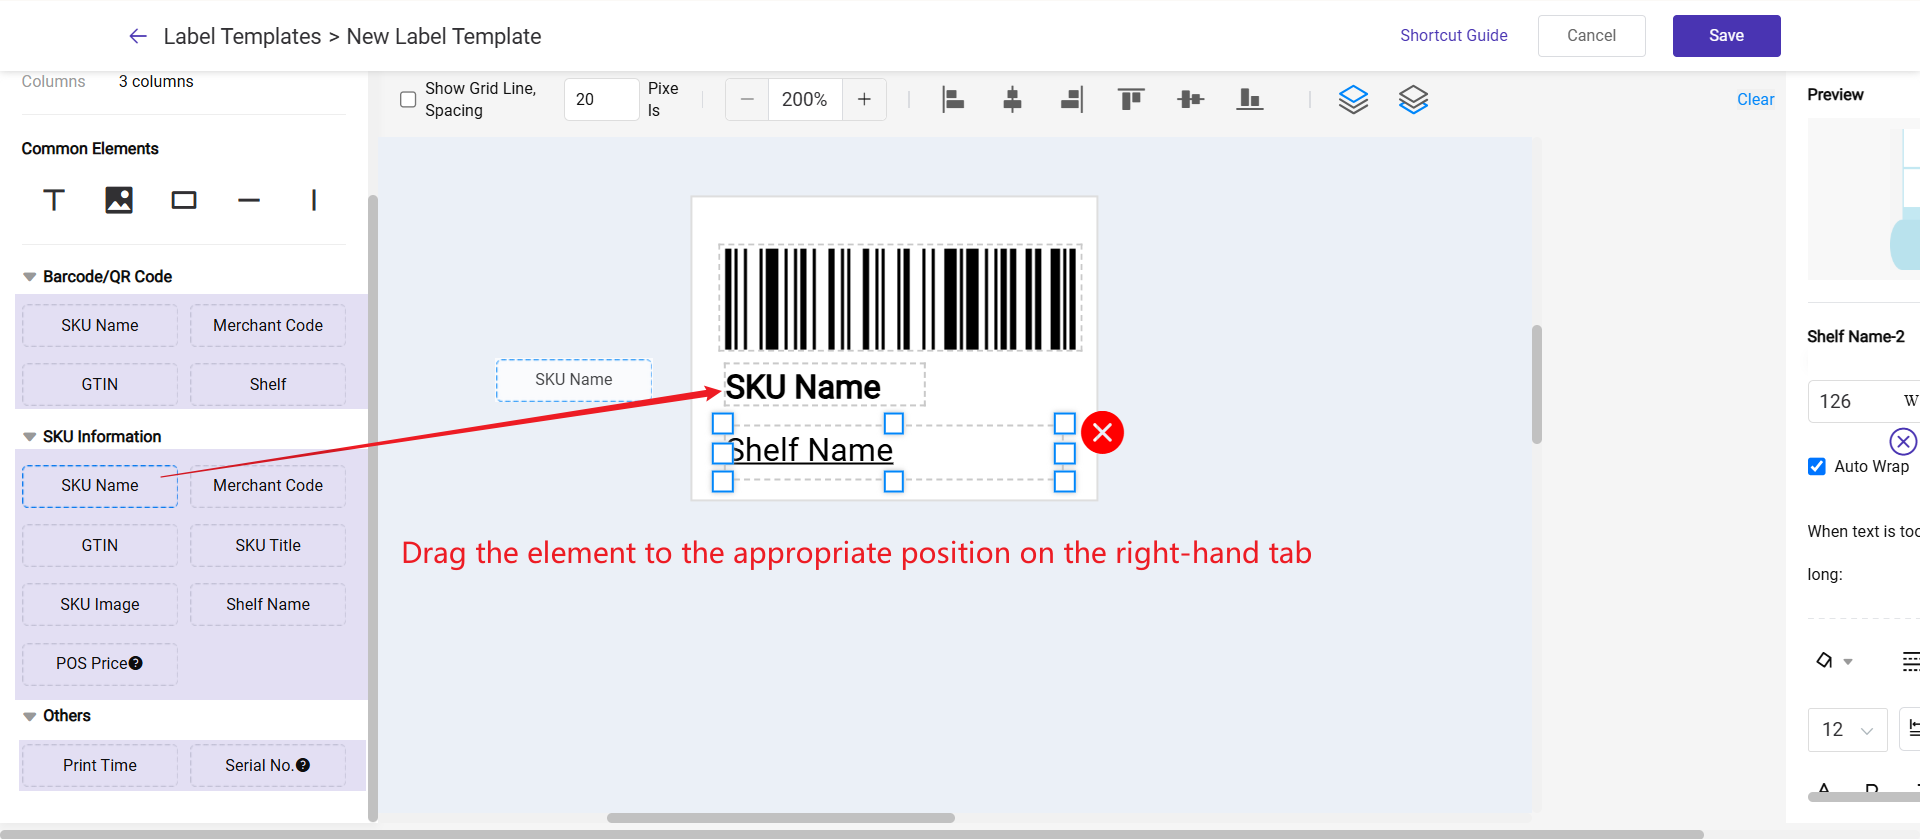
- Change font size, boldness, alignment, and position
- Add Common Elements
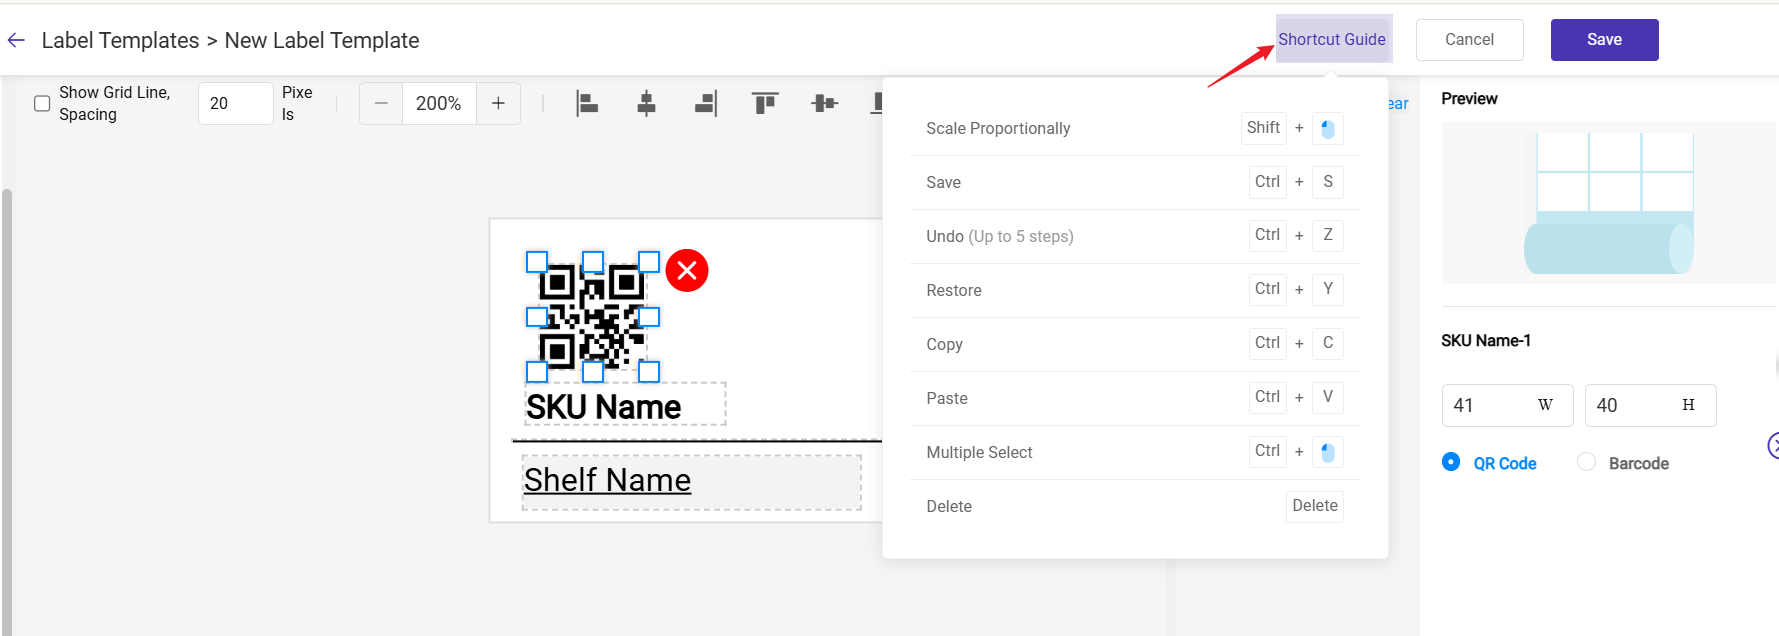
- Keyboard shortcuts
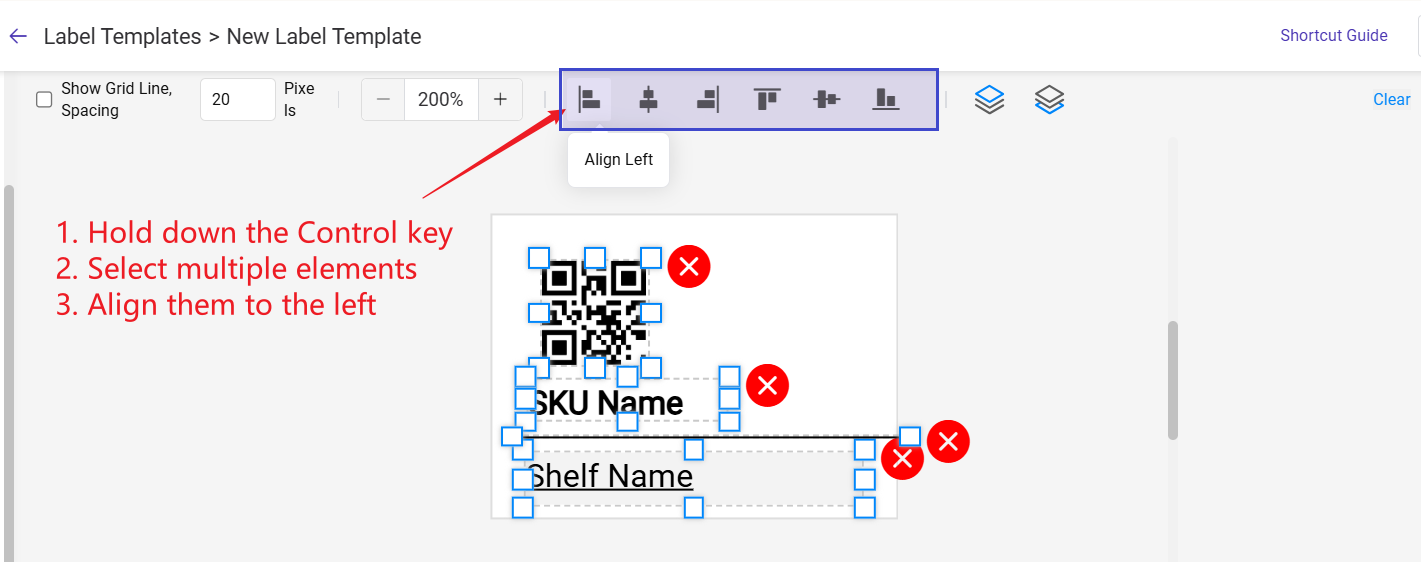
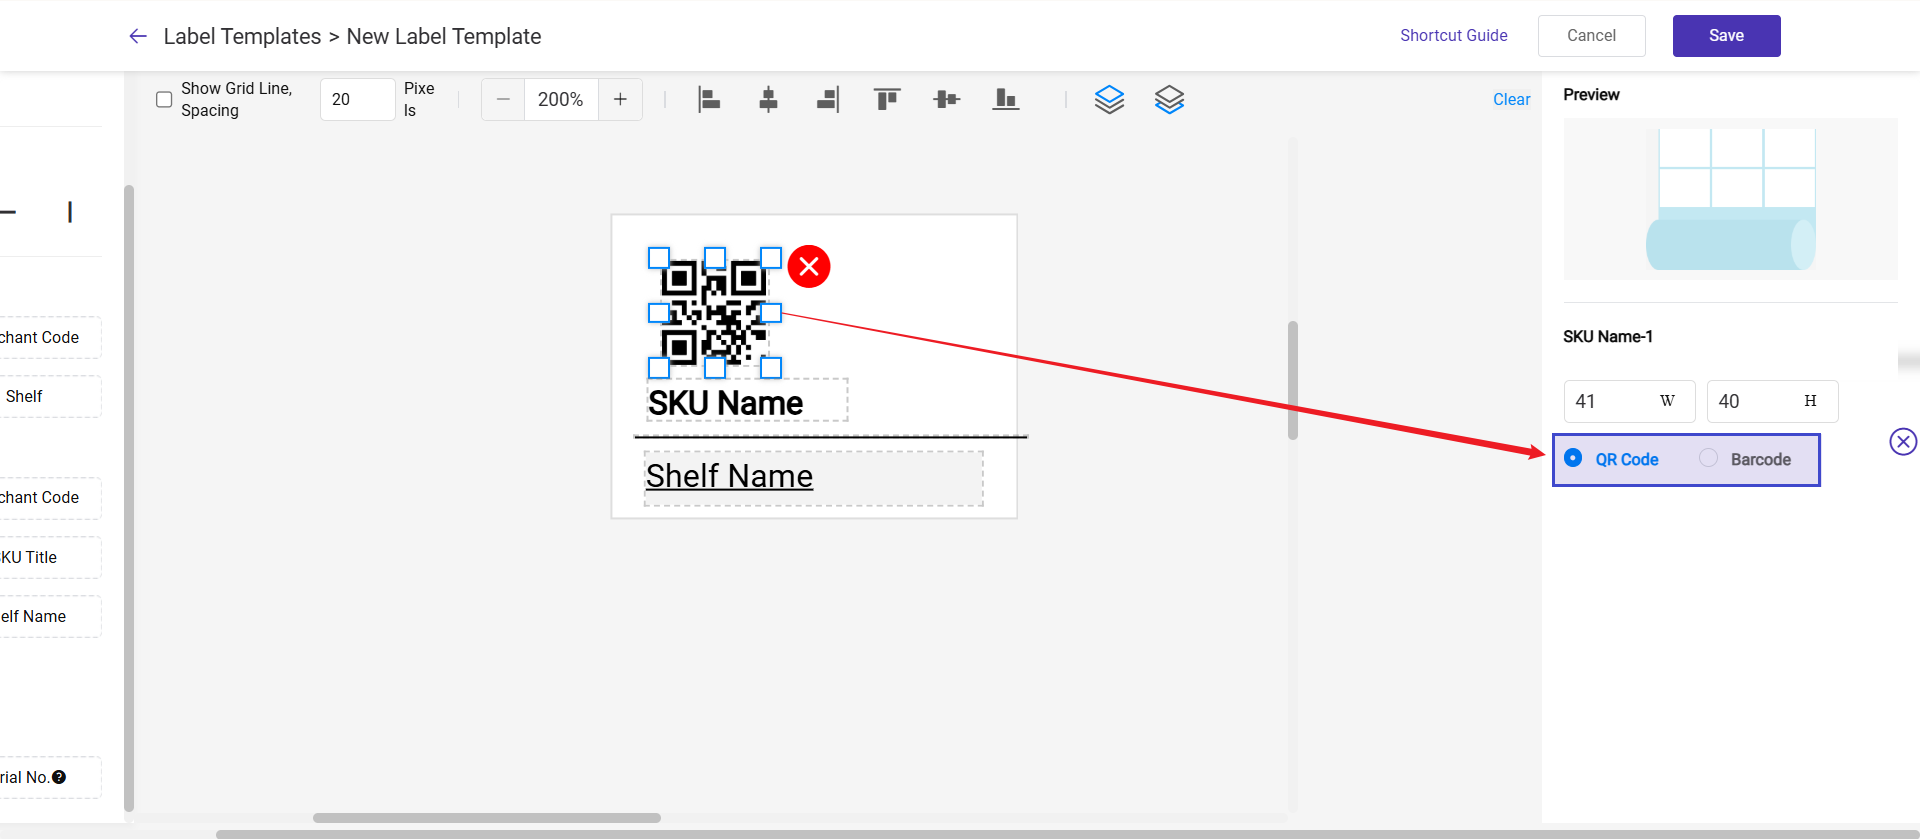
For example, you can hold down the Control key on your computer, select multiple elements, and align them to the left with a single click.
💡 Barcode Generation Methods (Merchant SKU Name, GTIN, Merchant Code)
In the system, there are three ways to generate barcodes/QR codes (By Merchant Code, SKU Name, GTIN). You can choose which type of barcode to print based on the number type maintained for the Merchant SKU.
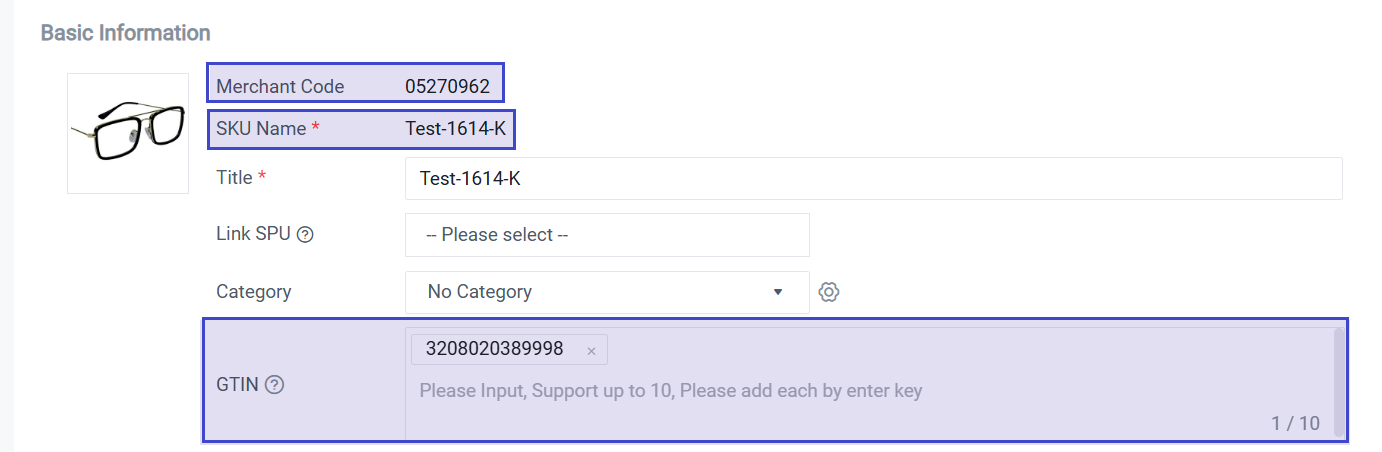
You can also choose whether to print a barcode or a QR code.
Method 1: Generated by Merchant SKU
If the merchant SKU only contains numbers, English letters, and symbols, and it is not too long, this method can be chosen. For example:- 100ab&A-1 ✅
- 100ab&A-1-100ab&A-1-100ab&A-1 ❌ (too long)
- 100ab&A-1 [ตู้เสื้อผ้าชุดชั้นในของราชินี] ❌ (includes unsupported characters)
The 8-digit merchant code is auto-generated by Bigseller. It's recommended to select it when Merchant SKU does not meet label-generation specifications. For example, the merchant SKU is too long, includes Chinese characters.
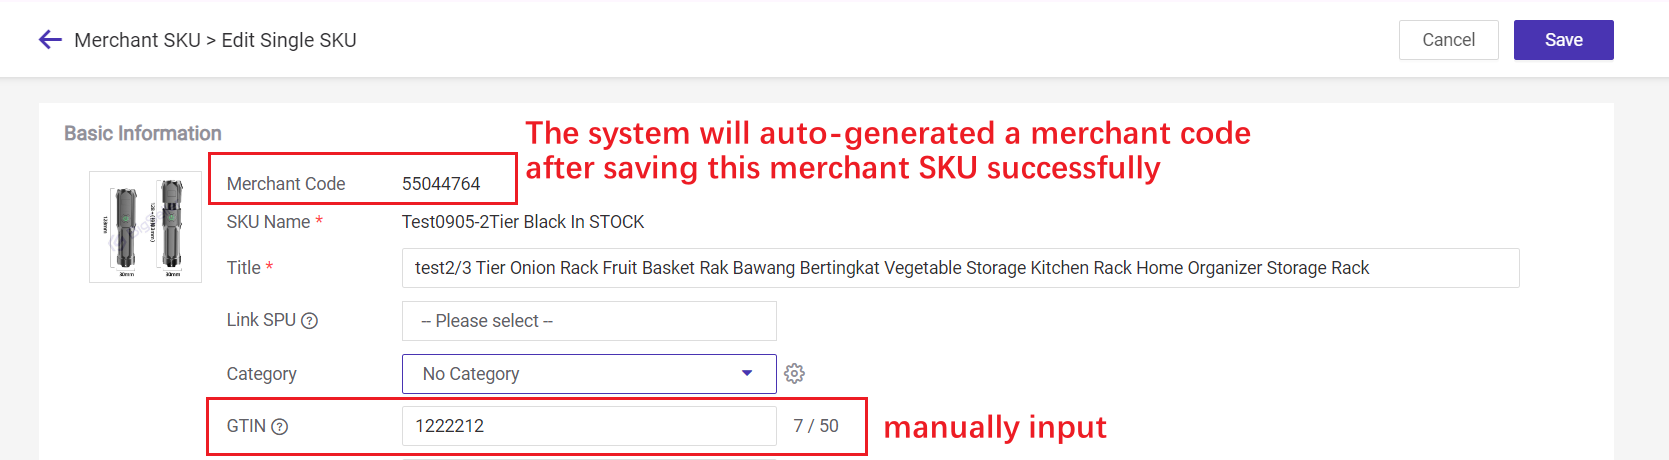
Method 3: Generated by GTIN
GTIN, the number under the barcode on product packaging, is not a mandatory field but should be unique once input, different from Merchant SKU, Merchant Code, and other GTINs.3) Save your label template.
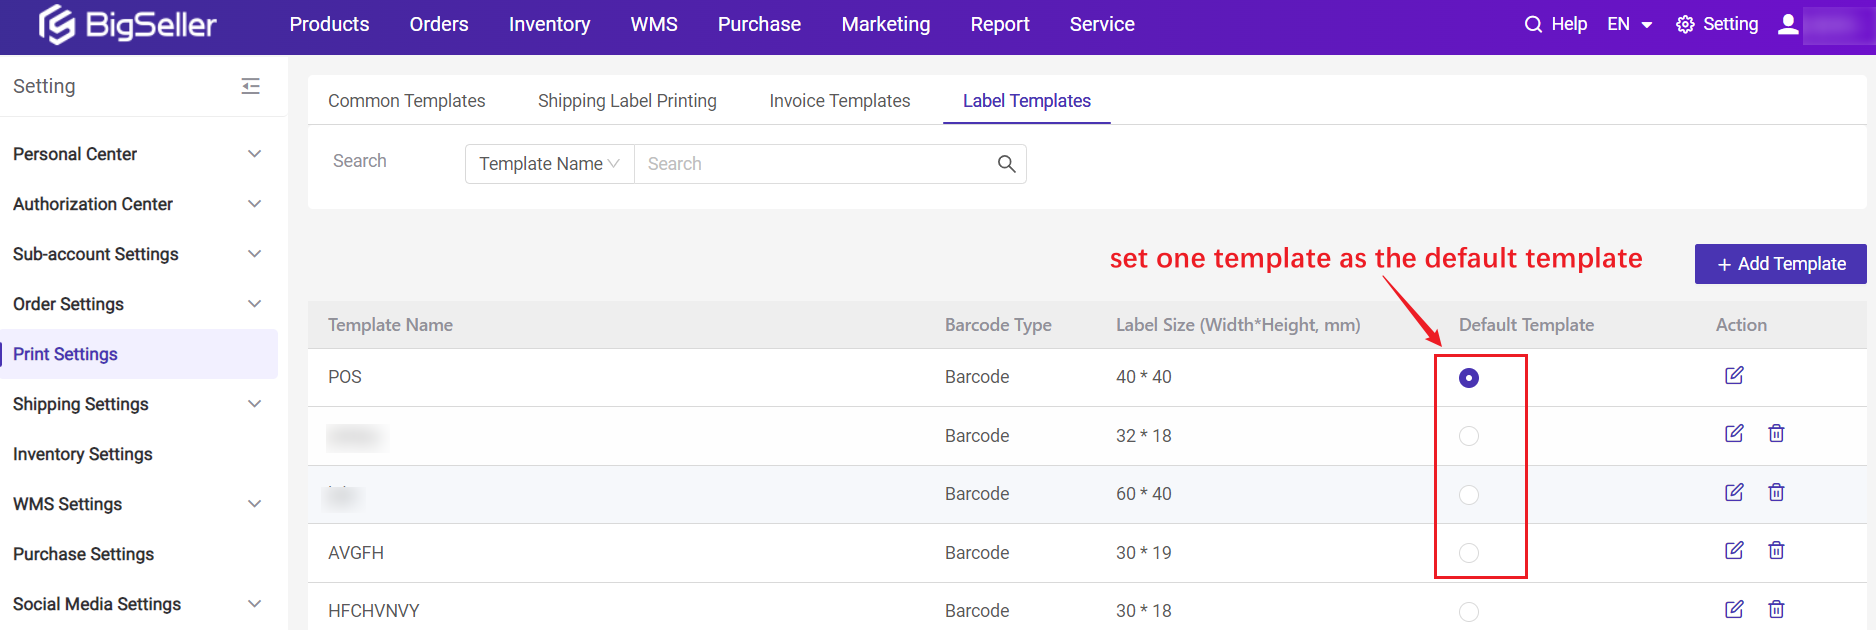
You can add up to 50 templates. Once you have added multiple templates, you can click to set a default one.
Step 3: Print Label
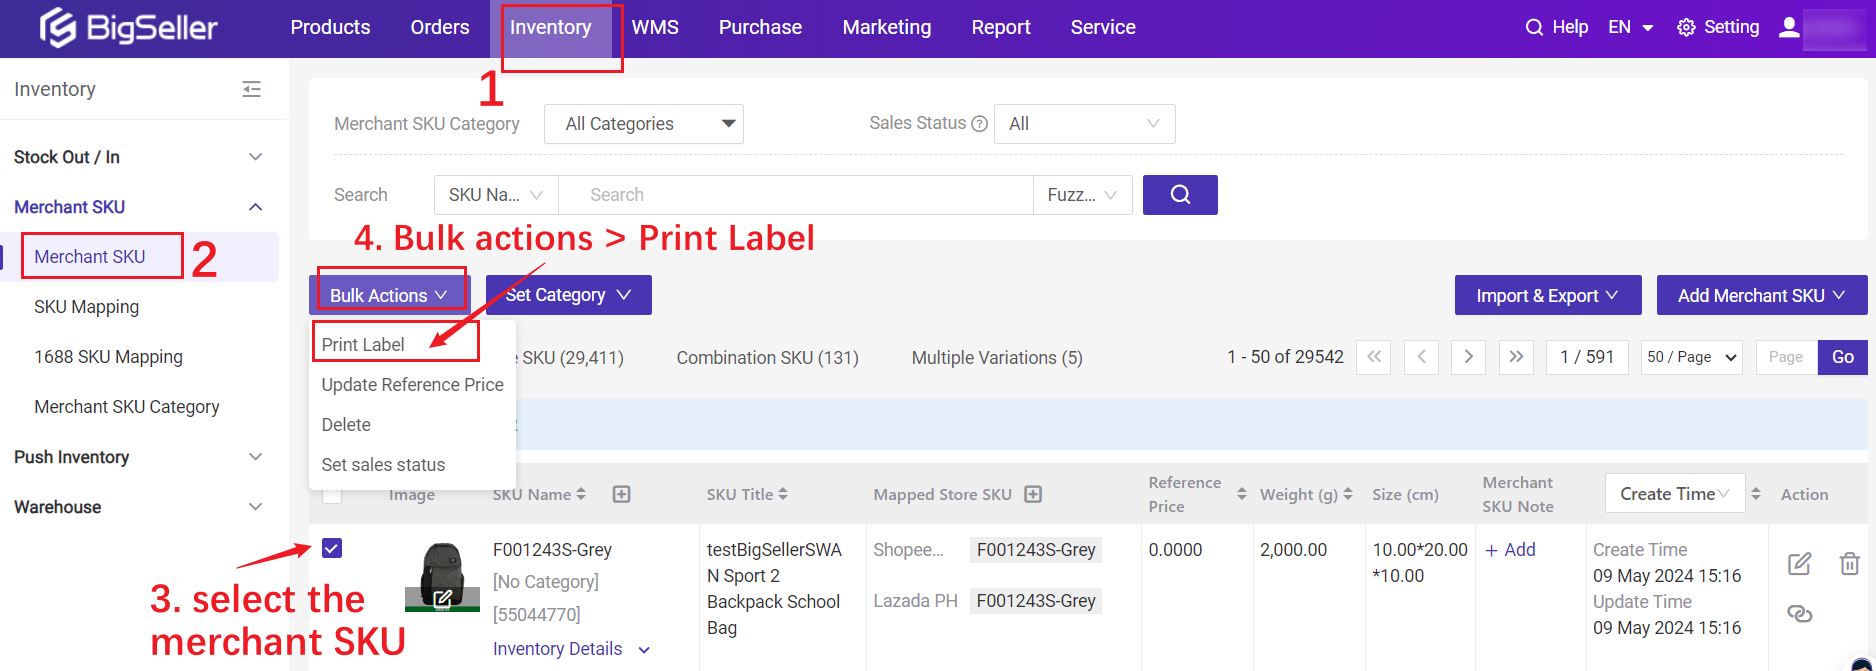
There are multiple entrances to print the SKU label.Method 1: On Merchant SKU list
Go to Inventory > Merchant SKU or Inventory List, and click Print Label under Bulk Actions after selecting Merchant SKUs that you need to print their labels.
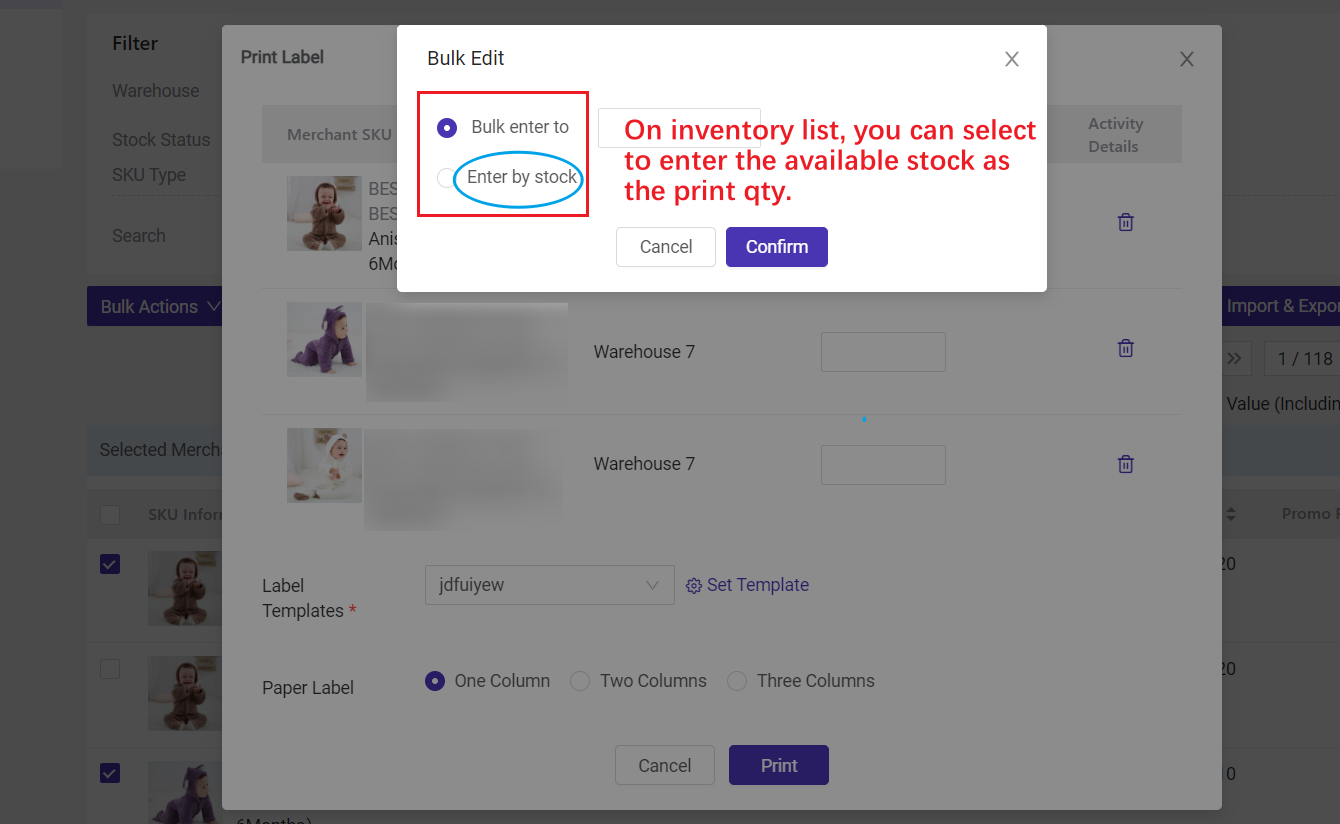
When you print labels on Inventory List, you can set the available stock as the print quantity.
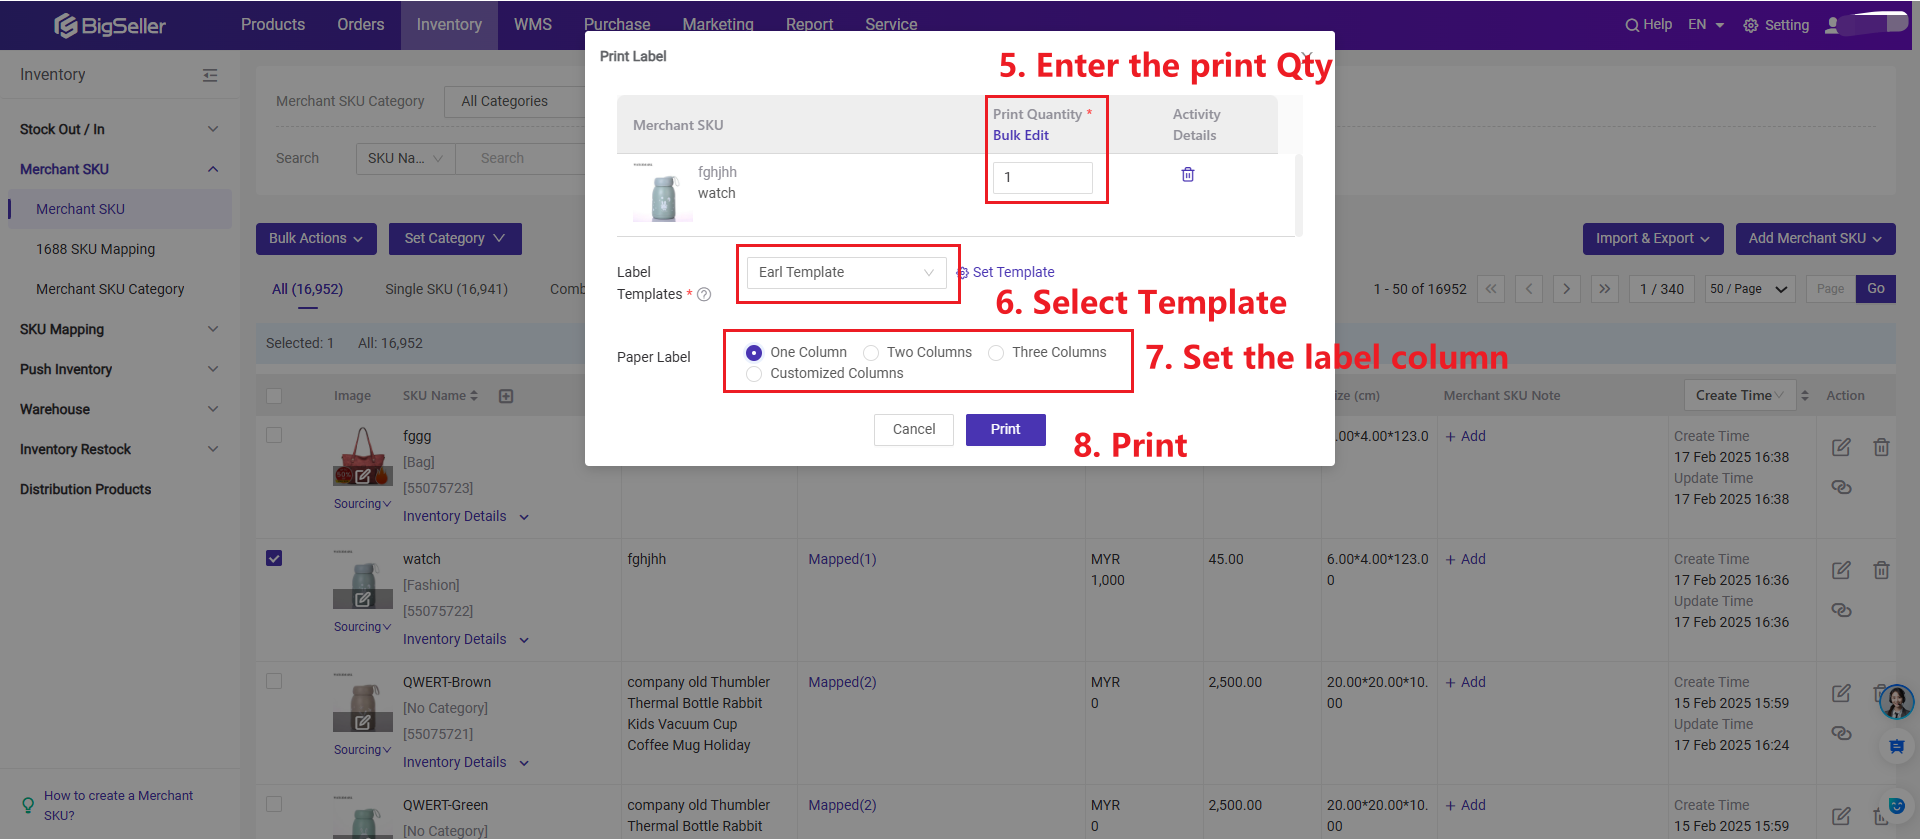
💡 Print Quantity: means how many times you need to print for a Merchant SKU.
Up to 10,000 labels can be printed at one time (Qty of Merchant SKUs * Print Quantity).
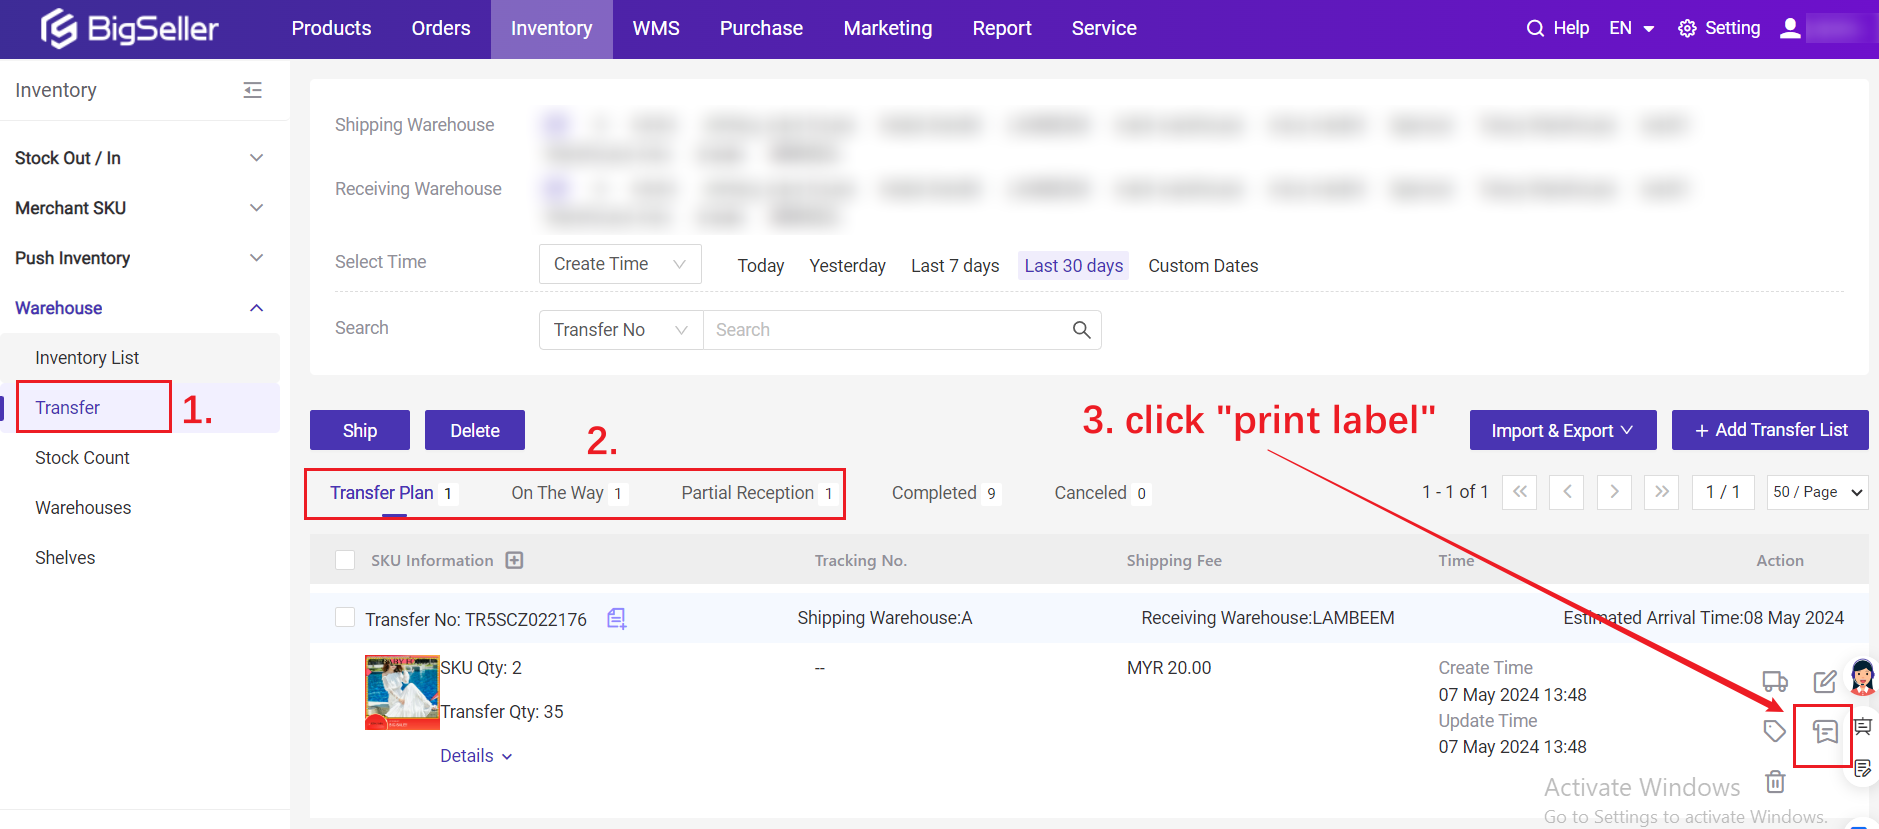
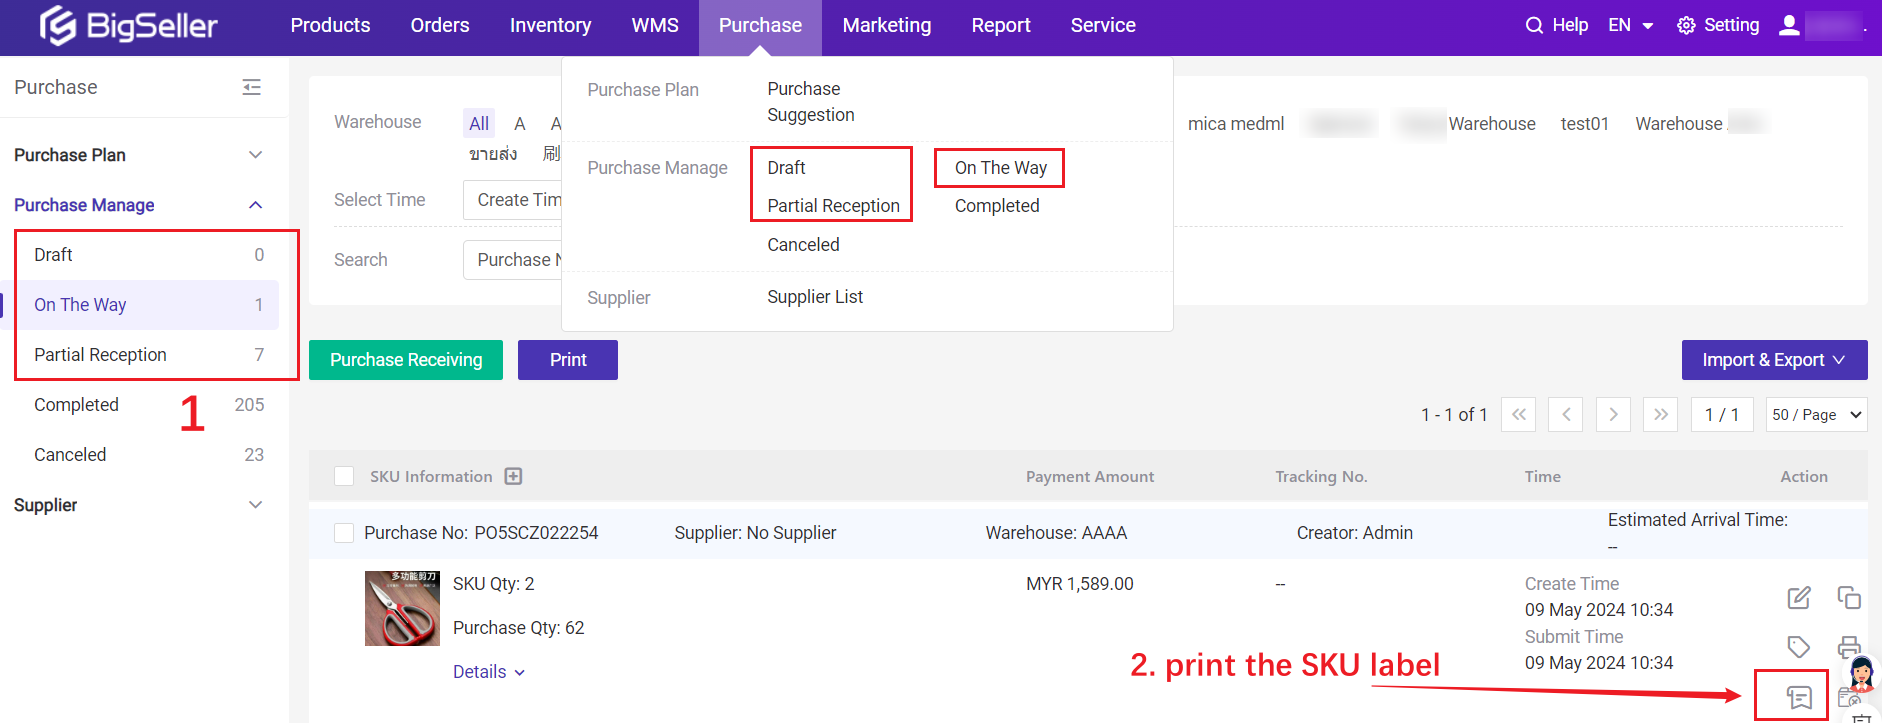
Method 2: On Transfer/Purchase List
Transfer: On the Transfer Plan, On the Way and Partial Reception lists, you can print the SKU label.
Purchase: On Draft, On the Way and Partial Reception lists.
💡 The Label Print Qty defaults to the Received Qty.
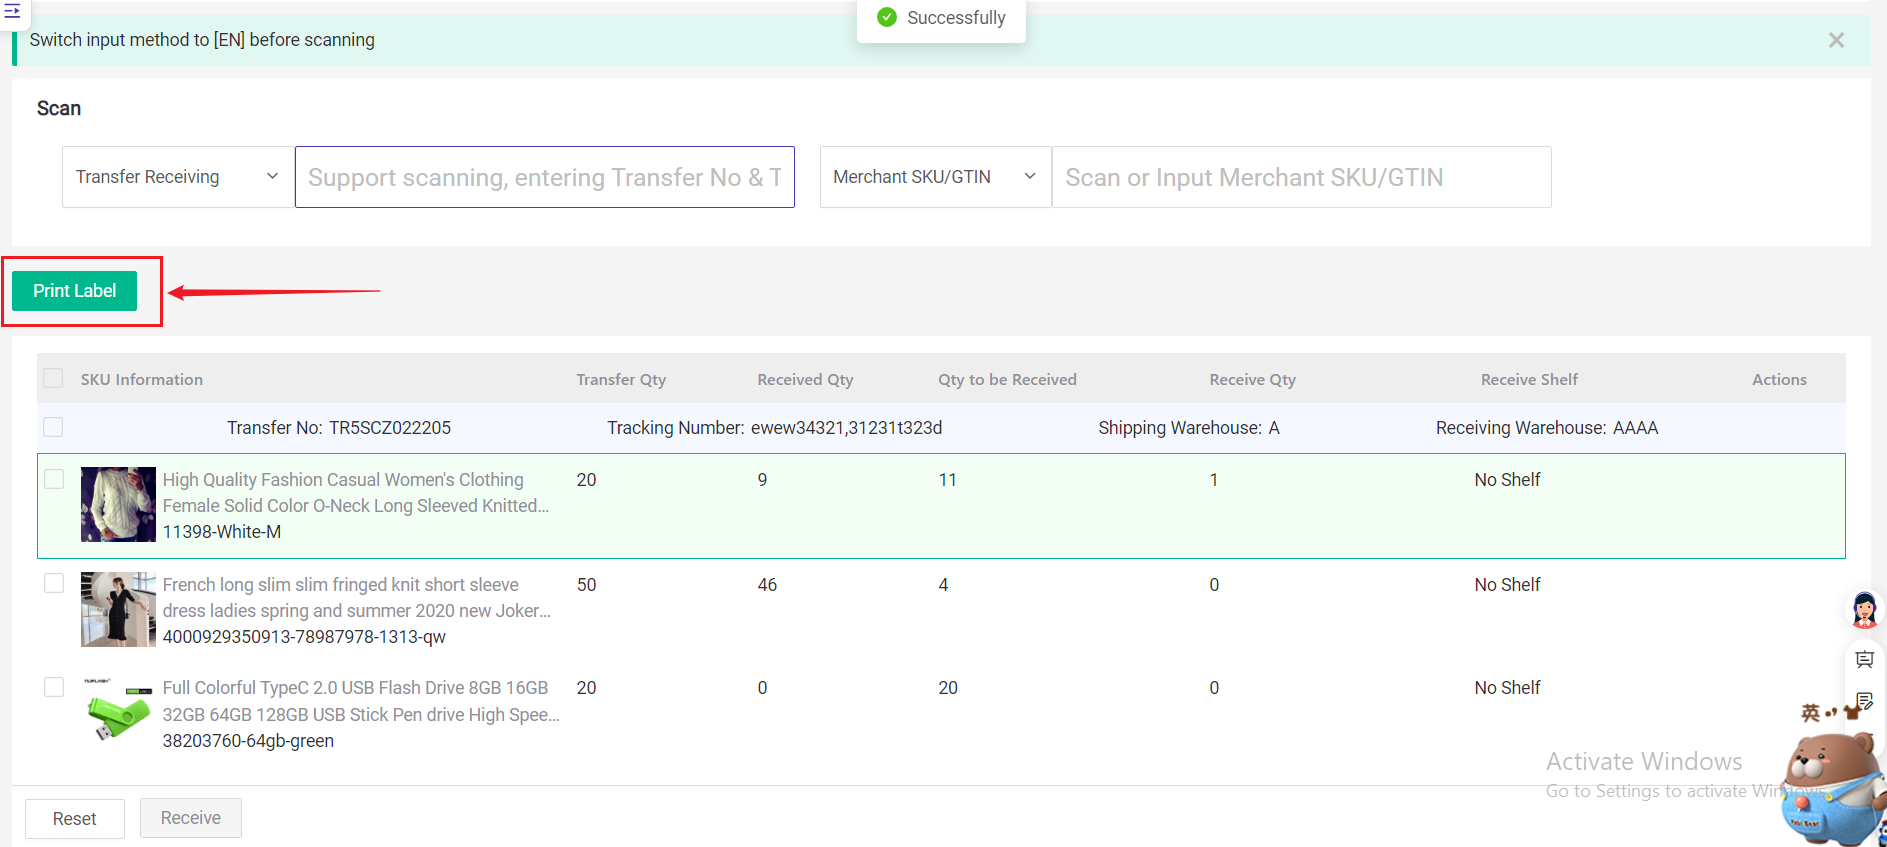
Method 3: On Purchase/Transfer Receiving list
After confirming receiving in [Scan to Receive], you can select SKUs to print labels.
💡 The Label Print Qty defaults to the Receive Qty.
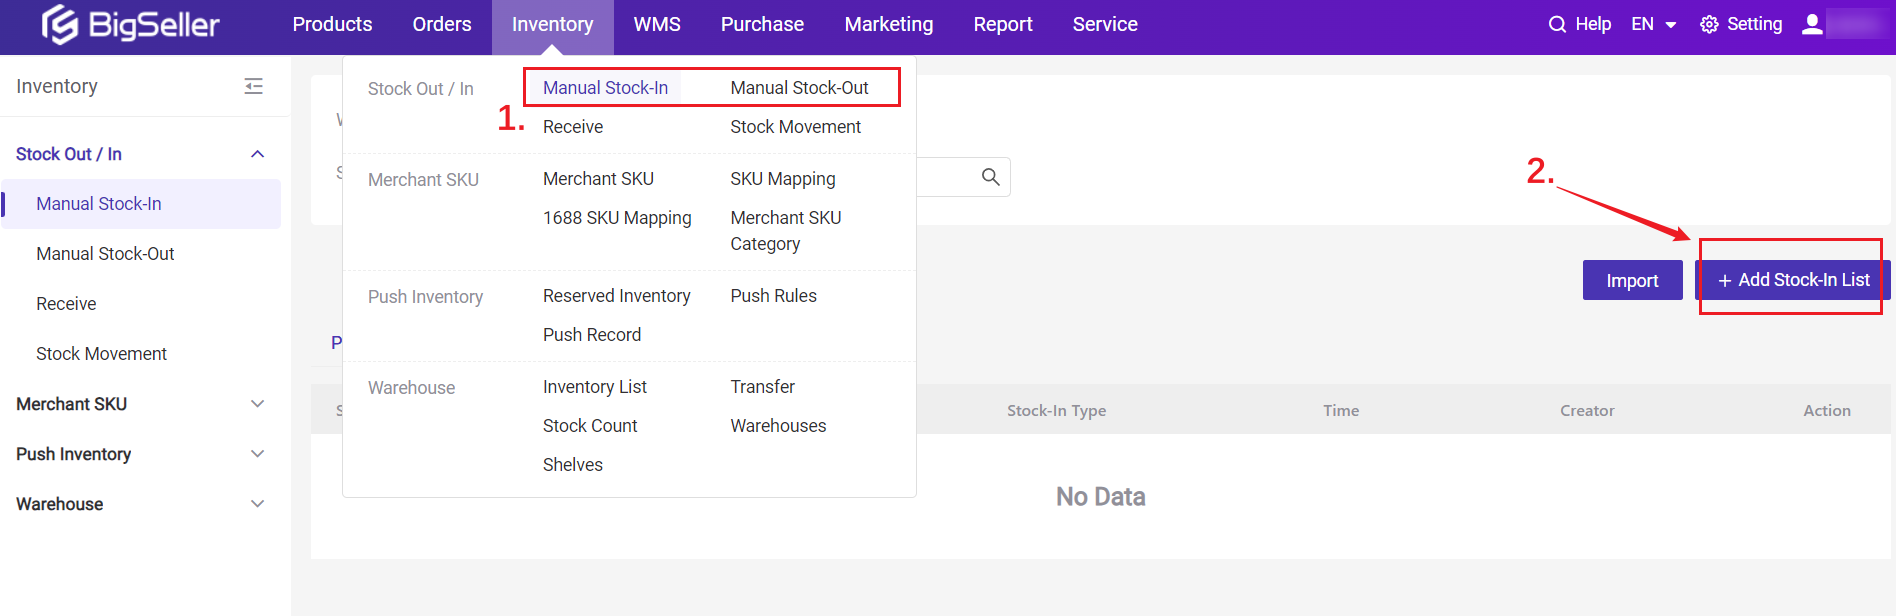
Step 4: Use the Label
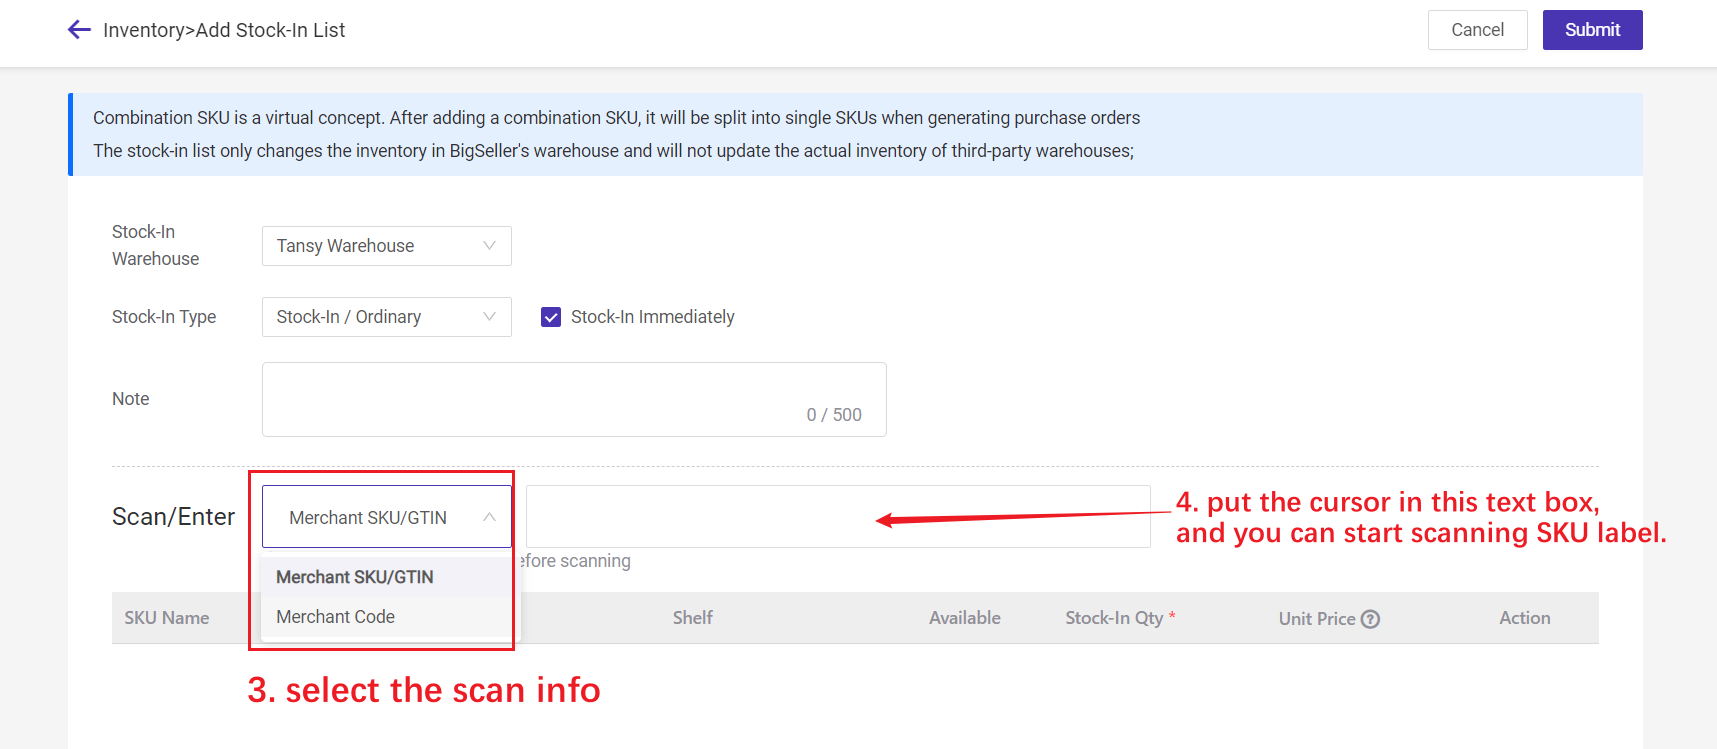
When your product has been taped to a label and you need to add or remove its stock, you can scan its label to easily stock-in or stock-out.Go to Inventory > Manual Stock-In or Manual Stock-Out and click Add Stock-In List or Add Stock-Out List.
Is this content helpful?
Thank you for your feedback. It drives us to provide better service.
Please contact us if the document can't answer your questions